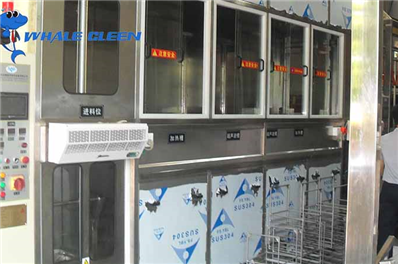
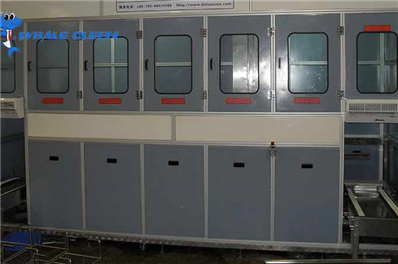
1. The Importance of Measuring Ultrasonic Cleaners
The performance of an ultrasonic cleaner directly impacts cleaning efficiency and equipment lifespan. Regular measurement helps avoid issues such as:
Reduced Cleaning Efficiency: Aging or misaligned transducers weaken cavitation effects.
Temperature Control Failure: Sensor malfunctions cause temperature deviations, damaging sensitive items.
Safety Hazards: Circuit aging or liquid leakage may lead to short circuits or electric shocks.
Case Study: A factory experienced batch product rework due to insufficient ultrasonic intensity, resulting in a loss exceeding $15,000, all because the equipment was not regularly measured.
2. Professional Measurement Procedures and Standards
1. Testing Institutions and Certification Requirements
Choose institutions with CMA (China Metrology Accreditation) or CNAS (China National Accreditation Service for Conformity Assessment) certifications.
Industrial-grade equipment must comply with ISO 9001 or ASTM E1002 standards.
2. Key Measurement Parameters
Measurement Item
Testing Tools
Qualification Standards
Ultrasonic Frequency
Frequency Analyzer
Nominal Frequency ±3% (e.g., 40kHz ±1.2kHz)
Ultrasonic Power Density
Power Meter, Hydrophone
≥0.5W/cm² (Industrial-grade Equipment)
Temperature Control Accuracy
High-Precision Thermometer
Set Value ±2°C
Cleaning Uniformity
Aluminum Foil Corrosion Test
Evenly Distributed Corrosion Holes
3. Recommended Testing Intervals
Household Equipment: Every 1-2 years.
Industrial Equipment: Every 6 months or per production batch.
3. User Self-Check Methods and Tools
1. Ultrasonic Intensity Quick Test
Aluminum Foil Test:
Hang aluminum foil (0.1mm thickness) vertically in the cleaning tank.
Fill water to the standard level and run the device for 5 minutes.
Observe the foil surface for corrosion holes:
Evenly distributed holes: Normal intensity.
Sparse or uneven holes: Transducer needs calibration or replacement.
2. Temperature Accuracy Verification
Compare the device display temperature with an industrial thermometer. Contact support if the deviation exceeds ±3°C.
3. Cleaning Effectiveness Evaluation
Contaminant Simulation Test:
Apply standard oil (e.g., ISO 12103-A2 dust mixed with oil) to a metal test piece.
Clean using the standard procedure and examine residue under a microscope.
Qualification Standard: Residue rate <5%.
4. Common Performance Issues and Solutions
1. Insufficient Ultrasonic Intensity
Cause: Aging transducers or unstable power supply.
Solution: Replace transducers or install a voltage stabilizer.
2. Uneven Tank Temperature
Cause: Damaged heating elements or poor water circulation.
Solution: Clean the pump filter and check heating element resistance (normal range: 20-50Ω).
3. Abnormal Noise
Cause: Loose transducers or tank resonance.
Solution: Tighten screws and install rubber dampers under the tank.
5. Maintenance and Calibration Tips
1. Daily Maintenance
Clean residues and dry the tank after each use.
Use a 5% citric acid solution monthly to descale and protect sensors.
Inspect power cords quarterly for insulation damage.
2. Transducer Calibration
Disconnect power and remove the transducer unit.
Measure transducer resistance with a multimeter. Replace if deviation exceeds 15% of the nominal value.
Ensure the transducer is tightly attached to the tank during reinstallation.
3. Data Recording and Tracking
Maintain equipment records, including test results and maintenance logs.
Industrial users should consider IoT systems for real-time performance monitoring.
6. Frequently Asked Questions
Q1: What if self-check results differ significantly from professional tests? A: Self-checks are preliminary. If major issues (e.g., power drop >30%) are detected, stop using the device and seek professional testing.
Q2: How to measure a used ultrasonic cleaner before purchase? A: Focus on ultrasonic intensity, sealing (check for leaks after 24 hours), and circuit board condition.
Q3: Is it worth repairing out-of-warranty equipment? A: If repair costs exceed 40% of a new unit’s price, consider replacement due to potential part discontinuation.
Conclusion
Measuring an ultrasonic cleaner is essential for ensuring cleaning quality and operational safety. Users can identify common issues through self-checks, but professional testing is recommended for core parameters like frequency and power density. Following a scientific maintenance plan and keeping detailed records can extend equipment lifespan and provide quality traceability for industrial users. For high-frequency use, consider annual maintenance agreements with manufacturers for technical support.