Knowledge | 2025-03-12
How to Maintain an Ultrasonic Cleaner: A Comprehensive Guide
Return
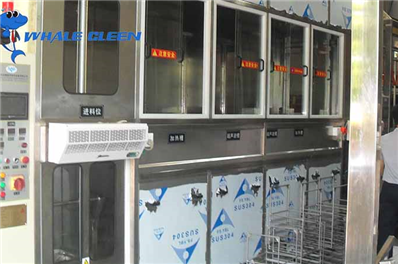
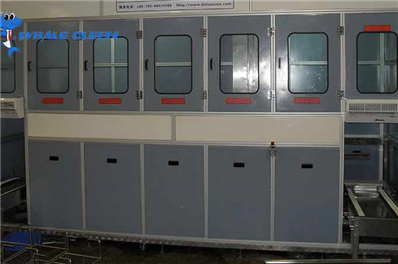
Ultrasonic cleaners are powerful and versatile devices used in various industries, from healthcare to manufacturing, for their ability to clean delicate and complex items efficiently. However, like any other equipment, ultrasonic cleaners require regular maintenance to ensure they function effectively and have a long lifespan. This article will guide you through the essential steps to maintain your ultrasonic cleaner, offering practical tips and advice to keep it in top condition.
1. Why Maintenance is Important
Regular maintenance of your ultrasonic cleaner is crucial for several reasons:
-
Optimal Performance: Proper care ensures the cleaner operates at peak efficiency, delivering consistent cleaning results.
-
Extended Lifespan: Regular maintenance prevents wear and tear, reducing the need for costly repairs or replacements.
-
Cost Savings: Well-maintained equipment consumes less energy and requires fewer repairs, saving you money in the long run.
-
Safety: Keeping your ultrasonic cleaner in good condition minimizes the risk of accidents or malfunctions.
2. Daily Maintenance Tips
-
Clean the Tank After Each Use
-
After every cleaning cycle, empty the tank and rinse it with clean water to remove any residue or debris.
-
Use a soft cloth or sponge to wipe the interior, avoiding abrasive materials that could scratch the surface.
-
Inspect the Cleaning Solution
-
Check the cleaning solution for contamination or discoloration. If it appears dirty or has lost its effectiveness, replace it with a fresh solution.
-
Avoid using harsh chemicals that could damage the tank or internal components.
-
Check for Leaks
-
Inspect the tank and connections for any signs of leaks. If you notice water pooling around the cleaner, address the issue immediately to prevent further damage.
-
Wipe Down the Exterior
-
Use a damp cloth to clean the exterior of the ultrasonic cleaner, removing dust and dirt. Avoid using excessive water to prevent moisture from entering electrical components.
3. Weekly Maintenance Tips
-
Deep Clean the Tank
-
Once a week, perform a deep clean of the tank by filling it with a mixture of water and a mild cleaning agent (e.g., vinegar or a specialized ultrasonic cleaner solution).
-
Run the cleaner for 10-15 minutes to remove any stubborn deposits or buildup.
-
Inspect the Transducers
-
The transducers are the components that generate ultrasonic waves. Check them for signs of damage or corrosion, and clean them gently if necessary.
-
If the transducers are not functioning correctly, the cleaning performance will be compromised.
-
Check the Heating Element
-
If your ultrasonic cleaner has a heating function, inspect the heating element for signs of wear or damage.
-
Ensure the temperature sensor is working correctly to avoid overheating.
4. Monthly Maintenance Tips
-
Inspect the Power Cord and Plug
-
Check the power cord for fraying or damage, and ensure the plug is securely connected.
-
Replace the cord if necessary to prevent electrical hazards.
-
Lubricate Moving Parts
-
If your cleaner has moving parts (e.g., a lid or basket), apply a small amount of lubricant to keep them functioning smoothly.
-
Test the Ultrasonic Performance
-
Run a test cycle with a known clean item to ensure the ultrasonic waves are working effectively.
-
If the cleaning performance is subpar, check the transducers and cleaning solution for issues.
5. Troubleshooting Common Issues
-
Reduced Cleaning Performance
-
Possible Causes: Dirty tank, contaminated cleaning solution, or faulty transducers.
-
Solution: Clean the tank, replace the solution, or inspect the transducers.
-
Leaking Tank
-
Possible Causes: Damaged seals or cracks in the tank.
-
Solution: Replace the seals or repair the tank.
-
Overheating
-
Possible Causes: Faulty heating element or temperature sensor.
-
Solution: Inspect and replace the faulty components.
-
Unusual Noises
-
Possible Causes: Loose parts or debris in the tank.
-
Solution: Tighten loose components or clean the tank.
6. Tips to Extend the Lifespan of Your Ultrasonic Cleaner
-
Use the Right Cleaning Solution
-
Always use cleaning solutions recommended by the manufacturer to avoid damaging the tank or internal components.
-
Avoid Overloading
-
Do not overload the cleaner with too many items, as this can strain the transducers and reduce cleaning efficiency.
-
Regularly Replace Worn Parts
-
Replace seals, gaskets, and other wear-prone parts as needed to maintain optimal performance.
-
Store Properly
-
When not in use, store the ultrasonic cleaner in a dry, cool place to prevent moisture damage.
7. Conclusion
Maintaining your ultrasonic cleaner is essential for ensuring its longevity and performance. By following the daily, weekly, and monthly maintenance tips outlined in this guide, you can keep your cleaner in excellent condition and avoid costly repairs. Regular care not only enhances the cleaning results but also ensures the safety and efficiency of your equipment. With proper maintenance, your ultrasonic cleaner will continue to serve you well for years to come.
This article provides a comprehensive guide on maintaining an ultrasonic cleaner, offering practical tips and advice to help users keep their equipment in optimal condition. We hope this information proves valuable to you!